How To Remove Popcorn Ceiling
How to Remove Popcorn Ceiling – A Simple Guide
Do you ever look up at your ceiling and feel like you've traveled back in time a few decades? Those bumpy, textured surfaces, often called popcorn ceilings, or sometimes known as cottage cheese or acoustic ceilings, were once quite popular, but they tend to make a space feel a bit old-fashioned now. It’s a common wish for many homeowners to update their rooms by getting rid of that textured look, and the good news is that you can actually do it yourself, or you can find ways to cover it up if taking it down feels like too much work. We are going to talk about how to get rid of that dated texture and bring your ceiling into a more current style.
Getting rid of these textured ceilings can give your home a fresh, more open feel, making your rooms seem bigger and brighter, really. The process of taking down these textured surfaces is something many folks consider because the old style can be a bit of a magnet for dust and cobwebs, which, you know, isn't ideal for keeping things tidy. Plus, trying to fix a spot on one of these ceilings or even paint over it can be a real headache, often leaving things looking uneven or just not quite right. This guide is here to help you figure out the best way to approach this project, whether you're ready to get hands-on with the removal or if you're just exploring options for a smoother, more modern overhead view.
This whole idea of updating your ceiling might seem like a big job, but with the right steps and a bit of preparation, it can be a project that truly changes how your home feels. We'll walk through what you need to know, from getting your space ready to the actual process of taking down that texture, and even what to think about before you start, so you can make sure everything goes as smoothly as possible. It’s pretty much about making your home feel more like you, with a clean, updated look that really brings things together, so.
Table of Contents
- Why Do Folks Want Popcorn Ceilings Gone, Anyway?
- What You Need to Know Before You Start Your Popcorn Ceiling Removal Project?
- The Steps to Take Out That Textured Look
- What If You Don't Want to Scrape?
- After the Popcorn is Gone
- A Quick Recap of Getting Rid of Popcorn Ceilings
Why Do Folks Want Popcorn Ceilings Gone, Anyway?
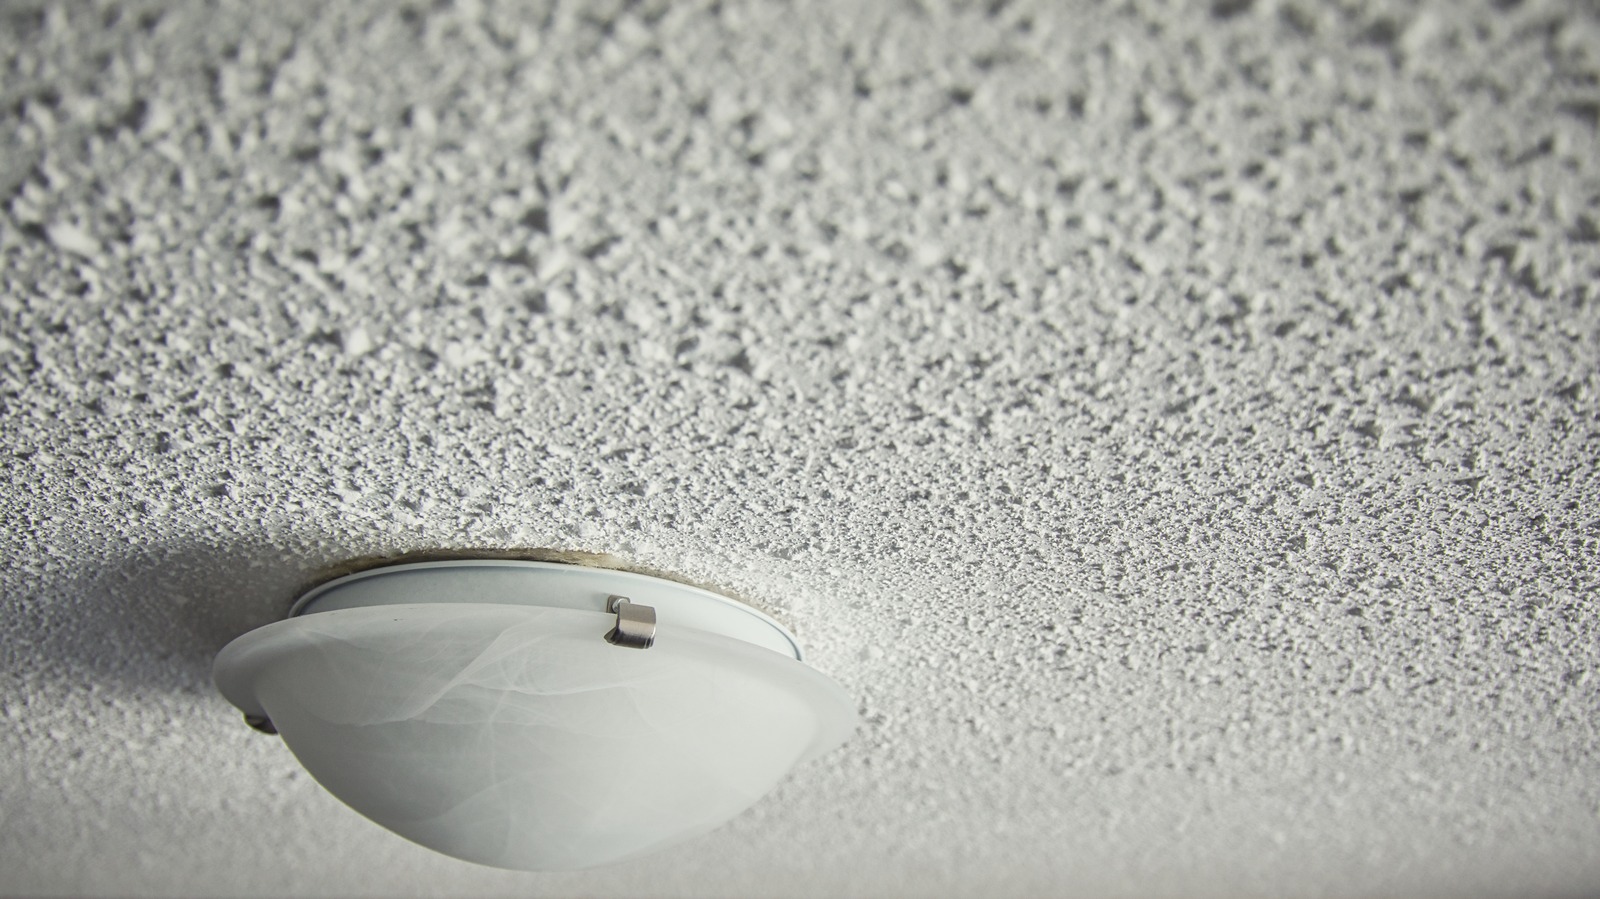
It's interesting how some home styles just don't stand the test of time, isn't it? Popcorn ceilings, which really had their moment in the 70s, are a perfect example of something that looks a bit out of place in most homes today. For one thing, they can make a room feel a lot smaller and darker than it actually is. The texture catches shadows in a way that a smooth ceiling just doesn't, and that can make a space feel a little closed in. People often find that once they get rid of that bumpy surface, their rooms suddenly seem more open and airy, which is a pretty nice feeling, really.
Beyond the way they look, these textured ceilings can be a bit of a bother for other reasons. Trying to keep them clean is, well, it's almost a lost cause. That bumpy surface is just perfect for catching dust and collecting cobwebs, and trying to wipe it down can be a real challenge without making a bigger mess or even damaging the texture itself. Then there's the issue of repairs. If you have a water stain or a crack, trying to patch up a popcorn ceiling to blend in perfectly with the existing texture is incredibly difficult. You often end up with a spot that stands out, making the ceiling look even more worn, so.
Painting a popcorn ceiling is another thing that causes a lot of frustration for homeowners. The rough surface soaks up paint like crazy, meaning you need a lot more paint than you might expect, and even then, getting an even coat can be a struggle. Plus, the texture itself can sometimes flake off during painting, which just adds to the work. All these little things add up, making many people decide that taking down the popcorn texture is worth the effort for a smoother, cleaner, and more up-to-date ceiling that is just easier to live with, you know?
What You Need to Know Before You Start Your Popcorn Ceiling Removal Project?
Before you even think about grabbing tools and getting started on your ceiling project, there's a really important thing to consider, something that could affect your health and safety. Popcorn ceilings, especially those put in before the late 1970s, might have something called asbestos in them. This material was used a lot back then because it was good for sound and fire resistance, but we know now that breathing in its tiny fibers can be quite bad for your lungs over time. So, figuring out if your ceiling has this material is a big first step, actually.
Is Your Popcorn Ceiling Safe to Touch?
The only way to truly know if your popcorn ceiling contains asbestos is to have a sample tested by a professional lab. You can't tell just by looking at it, which is why testing is so important. There are kits you can buy that let you collect a small piece of the ceiling safely, or you can hire a qualified inspector to do it for you. If your ceiling does test positive for asbestos, then the best and safest approach is to hire a professional who specializes in asbestos removal. Trying to take it down yourself when it contains asbestos can release those harmful fibers into the air, making your home unsafe, which is a pretty serious matter, to be honest.
If your ceiling was put up after 1978, or if the test comes back negative for asbestos, then you're generally in the clear to proceed with a DIY removal. This knowledge gives you peace of mind as you move forward with your project. Knowing this upfront can save you a lot of worry and ensure you're making the right choices for your home and everyone in it. It’s about being smart and safe, you know, before you get into the physical part of the work, sort of.
Getting Ready for Your How to Remove Popcorn Ceiling Adventure
Once you've sorted out the asbestos question, it's time to get everything ready for the actual removal process. This project, while simple in its steps, can be quite a messy chore, so preparing your space properly will save you a lot of cleanup time later. Think about it like this: you're going to be scraping a lot of material from above your head, and gravity means it’s all coming down. So, protecting your floors and furniture is really the first practical step, basically.
You'll want to take out any furniture you can from the room. For anything that stays, cover it completely with plastic sheeting. Lay down thick plastic tarps or drop cloths all over the floor, making sure they go up the walls a bit, maybe taping them in place to create a sort of protective barrier. This will catch all the falling bits of ceiling texture and make cleanup much, much easier. You should also turn off the power to the room at your circuit breaker, especially if you'll be working near light fixtures or ceiling fans. Safety first, always, you know?
Now, about the tools you'll need for this job. You don't need a huge collection of fancy equipment, but having the right things will make the work go much smoother. You'll definitely want a garden sprayer or a spray bottle for wetting the ceiling, a wide scraping tool (something like a floor scraper with a long handle works well), a ladder or sturdy scaffolding to reach the ceiling comfortably, and buckets or trash cans to collect the scraped material. Don't forget safety gear: a good dust mask or respirator, safety glasses, and gloves are pretty important to protect yourself from dust and falling debris, so.
Having a putty knife or a smaller scraper for corners and edges is also a good idea. Some people find that a shop vacuum with a HEPA filter can be helpful for initial cleanup, but a simple broom and dustpan will also do the trick. The more prepared you are with your tools and protective coverings, the less stress you'll feel during the actual scraping, and the quicker you'll get to enjoy your new, smooth ceiling. It’s all about setting yourself up for success, as a matter of fact.
The Steps to Take Out That Textured Look
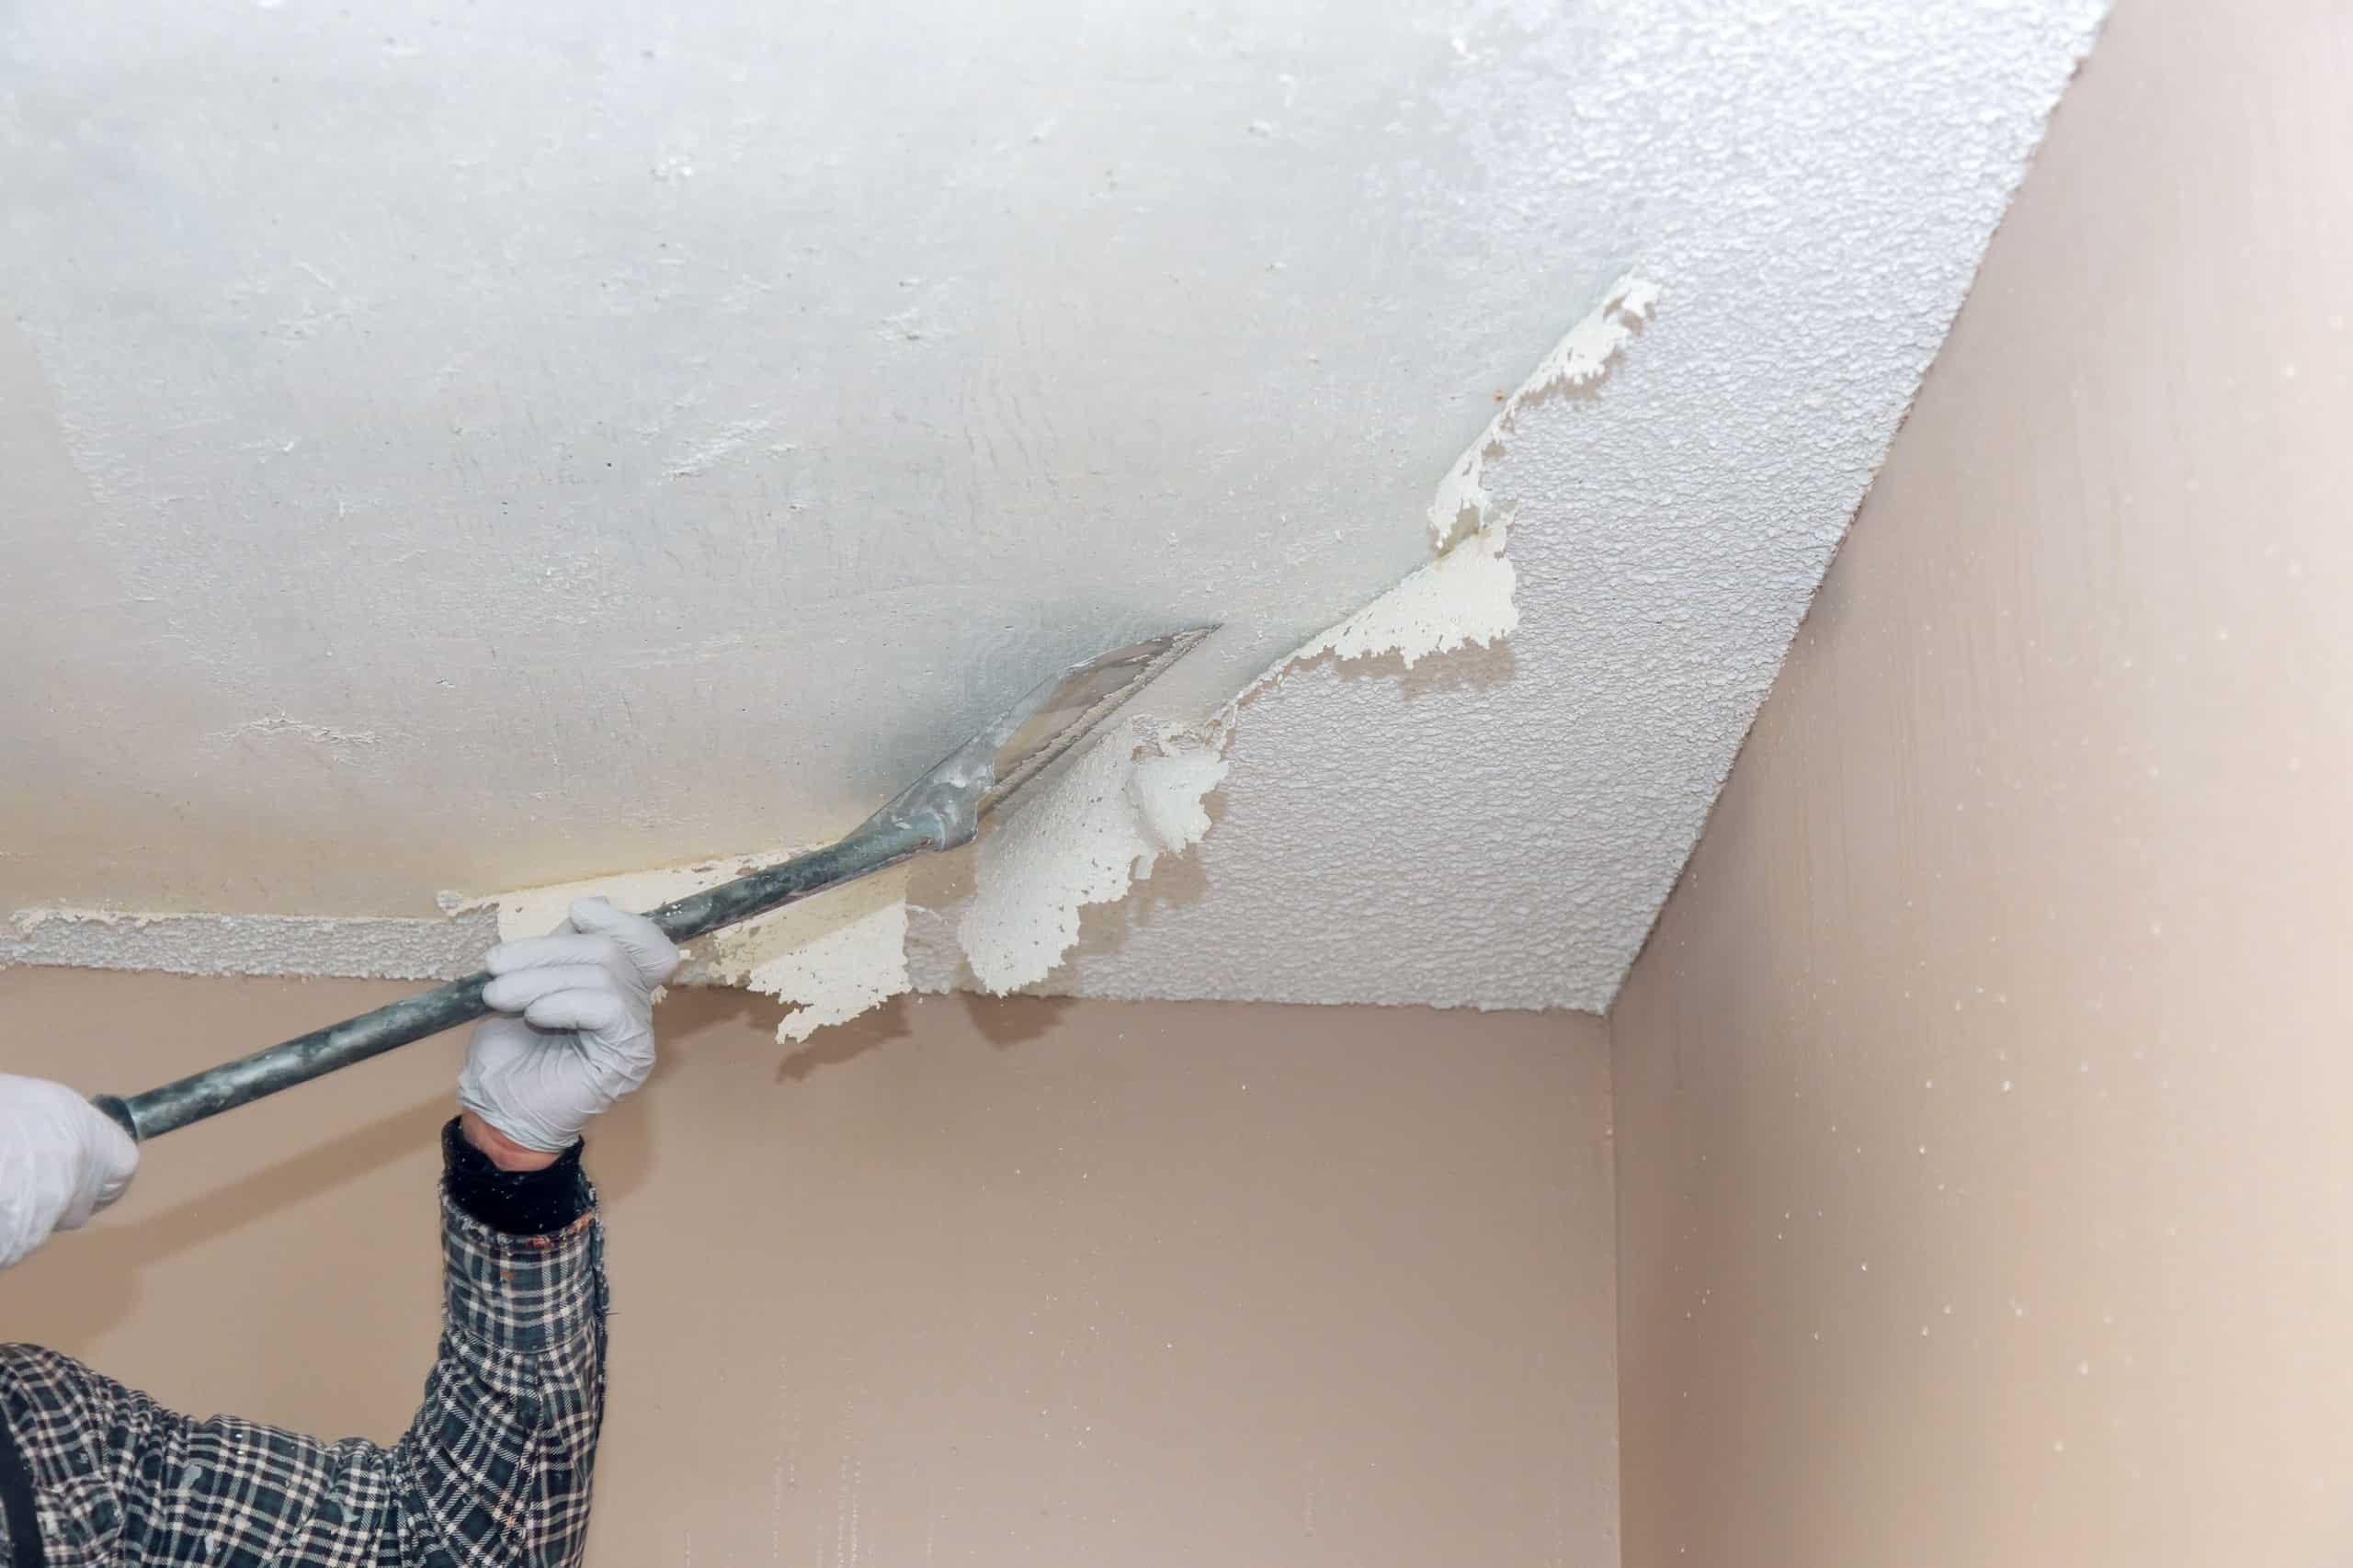
Alright, with your room all prepped and your tools ready, it's time to get to the main event: taking down that popcorn texture. This approach involves manually removing the texture using those specialized tools we talked about. It's a fairly straightforward process, but it does take some time and patience. Remember, you're working overhead, which can be a little tiring, so taking breaks is a good idea. The key to making this job easier is to wet the ceiling texture first, which helps soften it up, making it much simpler to scrape off, like your, you know, just taking off a sticker, almost.
How to Actually Remove Popcorn Ceiling Material
Start by lightly spraying a section of the ceiling with water using your garden sprayer. You don't want to soak it completely, just dampen it enough so the texture starts to absorb the moisture. Let it sit for about 15 to 20 minutes. This waiting period is pretty important because it allows the water to loosen the bond between the popcorn texture and the drywall underneath. If you try to scrape it dry, it's much harder and creates a lot more dust, which is something you definitely want to avoid, basically.
Once the section has softened, take your wide scraping tool and gently push it along the ceiling surface at a slight angle. The texture should come off in relatively large chunks. Try to keep your scraper flat against the ceiling to avoid digging into the drywall underneath, which could create more work later. Work in small sections, wetting and scraping as you go. You'll find a rhythm pretty quickly, and it's quite satisfying to see that old texture disappear, you know? Just keep those buckets or trash cans handy to catch the falling material, as a matter of fact.
For areas around light fixtures, vents, or in corners, you might need to switch to a smaller putty knife or scraper to get into those tighter spots. Take your time around these areas to avoid damaging any wiring or the fixtures themselves. It's a bit like peeling off old wallpaper, where some spots are easier than others. If a section isn't coming off easily, spray it again and give it a little more time to soak. Patience really pays off here, as you'll get cleaner results with less effort, truly.
What If You Don't Want to Scrape?
Maybe the idea of scraping all that texture off just doesn't appeal to you, or perhaps you've tested for asbestos and found it's present, making direct removal a no-go for a DIY project. The good news is that you don't always have to remove the popcorn ceiling to update your space. There are other ways to deal with that textured look, which can be a great alternative if scraping isn't the right path for you. These options let you update a textured ceiling without all the mess of taking it down, which is pretty appealing to many folks, naturally.
One popular way to cover a popcorn ceiling without removing it is to install new drywall right over the existing texture. This gives you a completely smooth surface to work with, ready for paint or any other finish you like. It's a bigger job than just scraping, involving lifting and screwing new sheets of drywall to the ceiling joists, but it completely hides the old texture and gives you a fresh start. This method is especially good if the existing ceiling has cracks or other damage that would be hard to fix otherwise, you know, making it a very clean solution, so.
Another option is to use ceiling panels. These come in various styles and can be glued or screwed directly onto the popcorn ceiling. They can give your room a whole new look, from a classic tin ceiling appearance to more modern designs. This can be a quicker and less messy way to hide the texture, and some panels even offer sound dampening qualities. It’s a bit like putting up a decorative skin over the old ceiling, and it can really transform the feel of a room without all the dust and debris of scraping, which is a big plus for many, too.
You could also consider using a skim coat of joint compound over the popcorn. This involves applying thin layers of joint compound directly onto the textured ceiling, smoothing it out to create a flat surface. This takes some skill with a trowel to get a really smooth finish, but it avoids the need for heavy demolition. It's a less invasive way to get rid of the bumpy look, though it does require a bit of finesse and multiple coats to achieve that perfectly flat surface you're probably aiming for, like your, you know, just smoothing out a wall, sort of.
After the Popcorn is Gone
Once you've scraped away all that popcorn texture, you'll likely find that the ceiling underneath isn't perfectly smooth. There might be some small bits of texture left, or perhaps some minor imperfections in the drywall from where the texture was attached. This is completely normal. The next step is to prepare the newly exposed surface for its new finish, which usually means a fresh coat of paint. This part is about making sure your ceiling looks its best, so it's worth taking your time here, honestly.
Start by giving the ceiling a good wipe down to remove any remaining dust or small pieces of texture. You can use a damp cloth for this, just make sure not to get the drywall too wet. After it's clean and dry, you'll probably want to do some light sanding to smooth out any rough spots or ridges. Use fine-grit sandpaper for this, and wear your dust mask again, as this will create some fine dust. The goal is to get the ceiling as smooth as possible, ready for what comes next, you know?
After sanding and cleaning, apply a good quality primer to the entire ceiling. Primer helps seal the surface, covers any lingering stains, and creates a uniform base for your paint. It also helps the paint stick better and look more even. Once the primer is dry, you can then apply your chosen ceiling paint. You'll probably need two coats of paint to get a nice, even finish. Standing back and seeing that smooth, fresh ceiling after all your work is a pretty satisfying moment, as a matter of fact.
A Quick Recap of Getting Rid of Popcorn Ceilings
Taking on a project to remove popcorn ceilings can truly change the feel of your home, making rooms look brighter and more current. It starts with figuring out if your ceiling has asbestos, which is a really important safety step. If it's safe to work on, you'll need to get your room ready by covering everything to protect it from the mess, and gather some basic tools like a sprayer and a scraper. The actual removal involves wetting the texture to soften it, then carefully scraping it away section by section. For those who prefer not to scrape, there are good alternatives like covering the ceiling with new drywall or panels. After the old texture is gone, a little cleanup, sanding, and a fresh coat of paint will leave you with a smooth, updated ceiling that you can be proud of, which is a nice thing, too.

11 Tips on How to Remove Popcorn Ceiling Faster and Easier | Family
How to Remove a Popcorn Ceiling
How To Easily Remove Popcorn Ceiling
